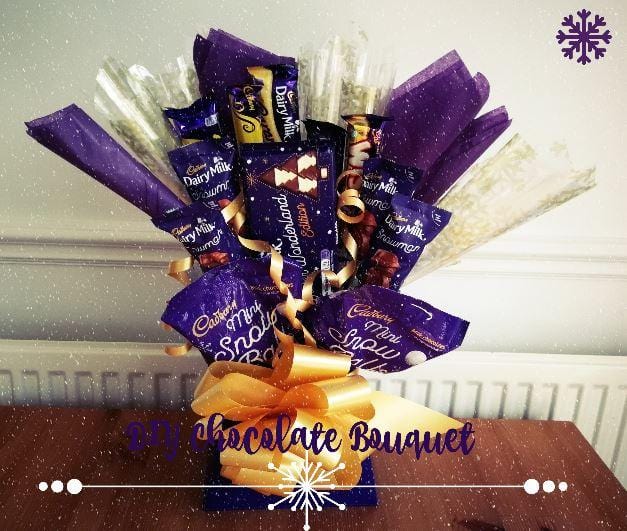
DIY Candy bouquet
As Christmas approaches we are thinking about all the gifting opportunities. But sometimes, a store bought gift just wont cut it, so you have to DIY. Home made gifts are ideal as they are personal and so thoughtful, and today we are showing you how to make this beautiful chocolate bouquet! Happy Crafting!
You will need;
- Vase Box
- A styrafoam brick
- Cellophane squares (3 large, 2 small)
- Tissue paper Squares (3 large, 2 small)
- A pull bow
- Wooden skewers (6 cut short, 4 left long)
- 12 chocolates (ideally 9 individual bars, 2 individual packets and one share bar/bag)
- Hot glue gun

We start by unfolding the vase box and cutting the top off of one of the tabbed sections.

We then hot glue the foam brick to the bottom section of the box and assemble the box around it, making sure the tab we cut is at the front and leave it open for now

Now take one of your cellophane squares and fold it in half, then half again. Open up the last fold and put a small amount of glue at the bottom centre where the first fold is.
Then, press one of your shorter skewers onto the glue and fold the cellophane back in half over it. Repeat this with all the large cellophane and tissue paper squares and place aside.
You can now repeat these steps with the smaller cellophane and tissue paper squares, attaching the longer skewers to them.

lets work on the chocolate now. Take your 9 individual bars and more skewers which have been cut in half. You can then flip you chocolate bars over so that they are face down and hot glue the skewers to the back of each bar.

Now, we are going to go back to our box and squares. Taking one of the larger squares, gently roll it to form a cone and pierce it into the back of the foam brick, holding it in place while you pierce 3 more of the larger squares in place next to it.
Just infront of that you can pop in the remaining 2 large squares, this will form a semi circle spray and will give pretty shape to your gift.

Roll and pierce in the smaller squares just infront now, in a diagonal fashion so they rest on the opposite side to which they were pierced.Do 2 on each side!

You can start arranging your 9 chocolate bars now - start with centre back and work outward on either side around to the edges where your smaller squares were placed.
Take your share bar/ bag now and sellotape a skewer to the back of it, and do the same with your individual packets too!

Next, pop the share bar/bag in the front centre of your foam brick, and assemble the front of the box.

Then, you can pierce the individual bags in, on either side of the share bar and close the front of the box up around it, rearranging until happy.

Lets grab the pull bow now. Simply pull on the thin curling ribbon to shape the bow and then hot glue the bow to the front of your box.
With the ribbon, we pull it around the box to the back, and then back to the front and tie it in place under the bow.
We then curl the tails of the ribbon and arrange them around the chocolate bars!

All done!
Isn't it beautiful?! And, the great thing is that they are totally personalisable, you can choose whichever chocolate your recipient likes best and design your box and cellophane to match it! You could even add a sticker to the front of the box with their name or a short greeting!