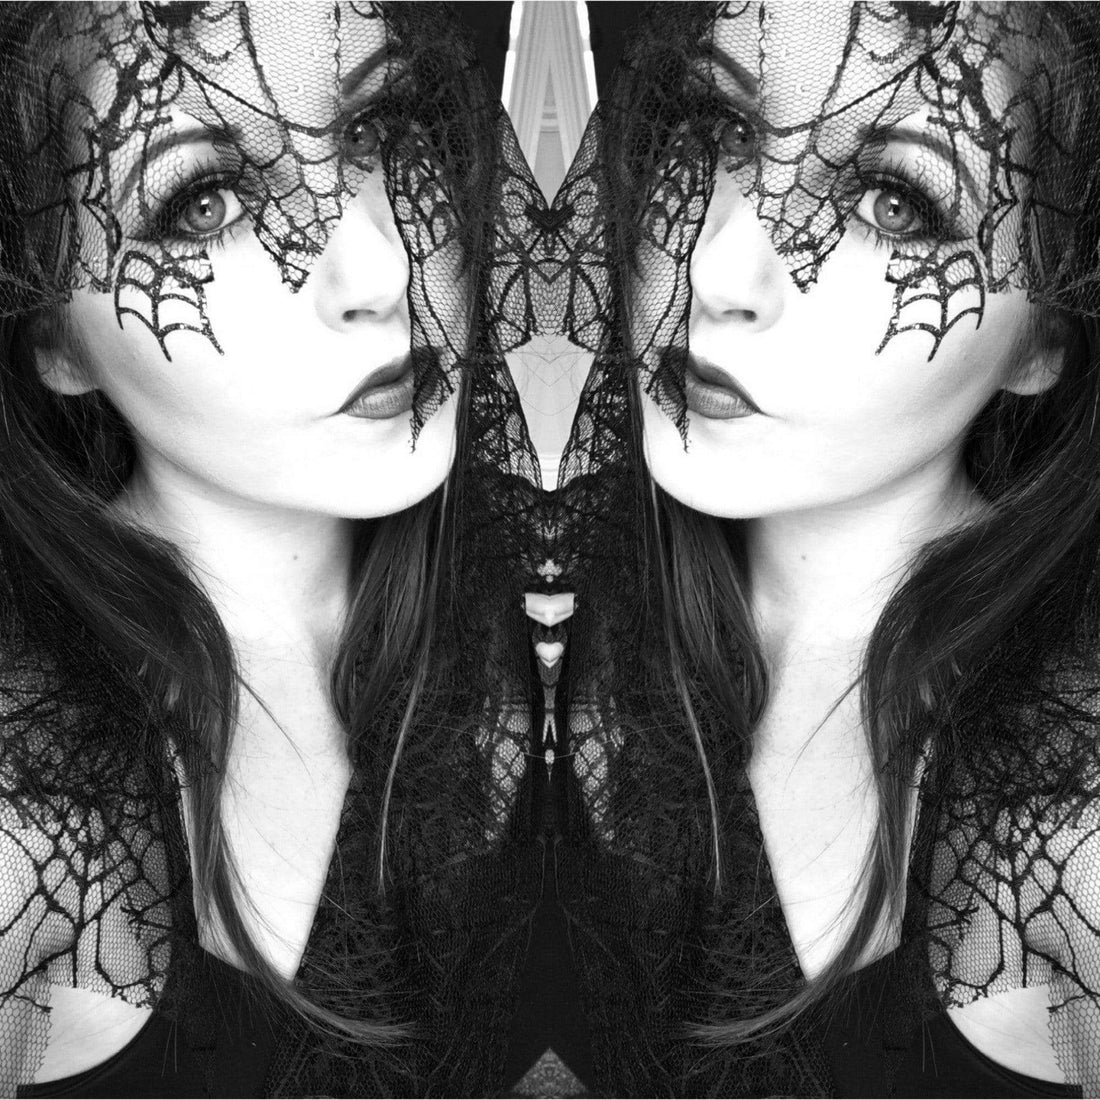
Halloween Queen Look
We dont know about you, but we ar super stoked for Halloween! Its such a fun time of year where you can have a good time with friends, dress up and get creative! in todays post we are going to show you how you can achieve this glamorous Halloween Queen look!

After cleansing and moisturising the face we are going in with a primer. We have opted for Benefits That Gal primer, and we are applying it to the face and neck with our fingers.
We want this look to be pretty structured so we are going to apply a contour powder to the cheek bones, down the sides of the nose, around the jawline and under the bottom lip. We're using a dark contour powder from the BH Cosmetics Contour & Blush powder palette and our Bella&Bear Leopard face brush.
For that Halloween ghoul glam we are going to use a very pale foundation and apply it to the face and neck using our Bella&Bear Kabuki brush. We're going to buff it onto the skin in circles for a smooth and even finish. We're loving the Clarins Everlasting Foundation in 'Ivory' for this look.

To make the face look flawless we are going to apply some concealer to disguise any dark circles or blemishes and bring light to the face. we're applying some Urban Decay Naked Skin concealer to the area under the eyes, the forehead, down the centre of the nose, the chin and the lower cheekbones. We're gently blending this into the foundation with our Bella&Bear Ocelot Large Concealer brush in an outward motion.
Next, lets set that concealer so it'll last all day. We're taking some ELF Studio HD powder and our Bella&Bear Tiger brush and we're lightly dusting some powder over the blended concealer.

To start work on the eyes we are priming them with some Benefit Stay Don't Stray eyelid primer and working it into the lids with our fingertip. We are then picking up our Bella&Bear Leopard Cat pencil brush and matte black shadow and we are applying it to the outer V of the eye and along the crease in a windscreen wiper motion. You can blend this out with your Bella&Bear Pampas cat brush if the line is a little harsh. We are also bringing this down to the lower lash line.
We're then using our Bella&Bear Iromote brush to pack a silver pearl shadow onto the lid blending it into the black shadow.
Let's line the eyes for definition and shape. We're taking our Bella&Bear Caracal liner brush and black liner - such as Benefit Creaseless Cream - and drawing a long thin line along the top lashline. We're also going to neatly wing this out.

Let's curl those lashes for some lift! We're using our Bella&Bear Eye&Mighty Lash Curlers and gently curling our lashes until happy with the result.
After applying a black kohl liner to the waterline we added a coat of mascara to the lashes. We have also added a pair of Red Cherry #WSP lashes, applying them as close to the lash line as possible with our Bella&Bear angled tweezers - this is optional, of course, but we feel they add some extra drama to the look!

Lets add a little colour to the face. Taking our Bella&Bear Tiger brush and a matte bronzer from the ELF Bronzer quad we are dusting the cheeks and temples with it.
We're following this by applying some Bourjois Lune D'or blush to the apples of the cheeks with our Bella&Bear Cheetah Duo Fiber Powder brush. This blush is the perfect mix of rose tint and golden highlight.

Lets frame the eyes by filling in the brows. We're starting by brushing the hairs through with the spoolie end of our Bella&Bear Iberian Lynx brush, this will neaten them up and give them a cleaner shape.
Were then using the angled brush end to fill in the brows with some Anastasia Beverly Hills Dipbrow pomade, accentuating the arch and extending the tail. You can then gently brush them through with the spoolie again to disperse any excess product and to make the hairs look natural and fluffy again.

To balance the look out we're going to opt for a bold lip. We're starting by lining the lips with a red lipliner and filling them in with it too, this will keep your lipstick in place all day (or night!). We're then taking our Bella&Bear Rusty Spotted Cat Lip Brush and some LimeCrime Velvetine in 'Wicked' and carefully filling in the lips with it. Note that this is a matte finish lip product so make sure to moisturise the lips first for a smooth finish.
Let's really bring some Halloween vibes to this look! We're going to apply this spiderweb skin sticker and some gems around the eye area - FaceLace also do some lovely designs.
Finish the look by misting your face with a setting spray to keep it in place all day! We love the Makeup Revolution Oil Control Fix Spray.

We added some Halloween touches to make the look extra glam, like this spiderweb lace cape from Claires Accessories and this gorgeous spiderweb crown, too!
We hope you enjoyed today's look - don't forget all of the Bella&Bear tools used in this tutorial are available in our online store right now! You can also tag us with your recreations and your fave Halloween looks on Facebook, Twitter or Insta!