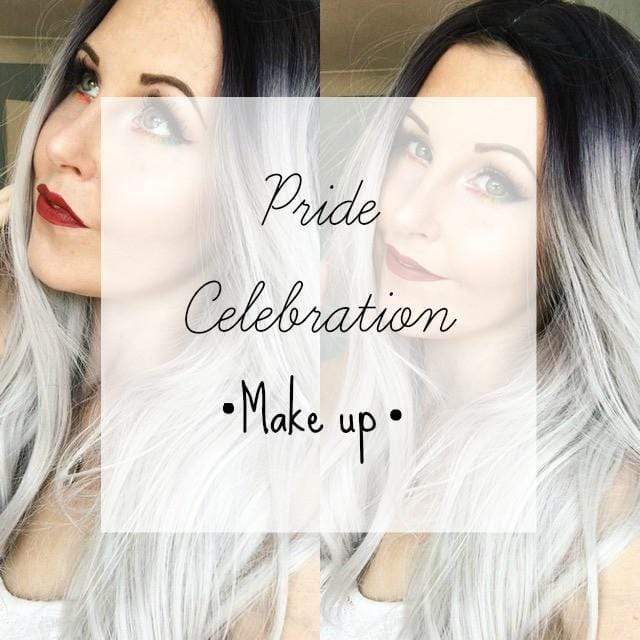
Pride Celebration Makeup

June is the official month of Gay Pride! A month where we celebrate diversity and all the things that make us unique! We are living in a time where people are much more accepting of each other and we here at Bella&Bear feel it is important to celebrate that and show everyone that we love them equally! We have created this fun Pride celebration makeup in hopes of spreading love & positivity. Its vibrant, festive and so fun!

To start, we prepped the skin with some Jelly Pong Pong All over Glow as a primer. We applied it to the skin with our Bella&Bear Jaguar angled kabuki for some serious glow.
Then, taking our City Colours Cream Contour palette we applied a contour to the hollows of the cheeks, the temples, the sides of the nose and the Jawline with our Bella&Bear Margay brush, and a highlight to our forehead, the centre of the nose, the under eye area and the area between the cheekbones and the jawline with our Bella&Bear Golden Cat concealer brush. We then buffed and blended it into the skin with our Bella&Bear Jaguar kabuki until pleased with the result.
We still wanted to use a concealer for this look to disguise any naughty blemishes or dark circles so we went in with some Urban decay Naked Skin concealer and blended it in with our Bella&Bear Ocelot large concealer brush.

As this is a cream contour we want to set the base with a translucent powder to keep it in place all day and stop it from sliding - particularly in the summer heat. We took our Bella&Bear Leopard brush and some ELF Studio HD powder and dusted it all over the face. We then spritzed the face with some Makeup Revolution Oil Control fixing spray for a dewy glow.
Let's add some pop to those peepers! After applying some Urban Decay Primer Potion to the lids, we used our Bella&Bear Pampas cat brush to dust the lid with a matte cream shadow, applying it right up to the brow bone. We then took a transition shade - we used a matte taupe - and used our Bell&Bear Bornean Bay Cat brush to apply it into the crease for some definition. Use a windscreen wiper motion for this to create a larger looking eye.
Then, we lined the eye using our Bella&Bear Caracal liner brush and some ABH Creme Colour liner. We created a dramatic and exaggerated wing for serious definition.

Next, for a glowing inner corner, we took our Bella&Bear Leopard Cat pencil brush and a highlight and applied it right into the inner corner generously. We used the highlight shade from the BH Cosmetics Take me to Brazil Palette for this.
Now, we're gonna work on that vibrant, colourful element! Again, we're using the BH Cosmetics Take me to Brazil Palette for this. So, we took our Bella&Bear Serval angled liner brush and a matte red shadow and started to apply it to the lower lashline in an angle from the inner corner of the eye.
Make sure you have a daily brush cleaner handy so you can wipe the bristles clean between each colour application.
We then did the same thing, but going in with an orange shade. Starting the line by blending it into the red and continuing out. Keep going using classic rainbow colours; yellow, green, blue and purple.

You can see here how we have blended the colours together, ending them by meeting the final colour up with the wing on the upper lash line.
To follow we applied a coat of mascara - we used Benefit They're Real - and we then used our Bella&Bear angled tweezers to apply some Ardell demi Wispies lashes as close to the lash line as possible. Falsies are, of course, optional, but they do add an extra dramatic finish to the eyes.
We then took our Bella&Bear Iberian Lynx Brow brush and some Freedom Makeup Brow Pomade and filled in the brows, giving them definition and shape!

Now, lets go in with some bronzer; this will add some colour to the face and also enhance the structure! We used the ELF Studio Brozning quad and our new Bella&Bear Bobcat blush brush to dust the cheekbones and the temples.
For a goddess like glow we added a generous amount of highlight. Using our Bella&Bear Cheetah Duo Fiber powder brush and some IHeartMakeup Blushing Heart in Iced Hearts we applied it to the apples of the cheeks, the temples, the tip of the nise, the cupids bow and the brow bone.
And, of course we had to finish up with a statement lip! using our Bella&Bear Rusty Spotted Cat Lip Brush we applied some Limecrime Velvetine in Wicked all over the lip precisely.

You're look is complete! You are ready to celebrate in style! Be sure to spritz the face again with your Setting Spray before you head out in the summer sun, too!

If you want to add some extra flare to the look, then how about applying a wig? We picked up this lovely grey wig here. The neatest way to apply your wig is to start by brushing through your hair to remove any tangled - we love our Bella&Bear The Bear Paddle brush for this - and then create a tight braid on each side of the head; these don't necessarily need to be neat but they should be tight.
Pin the braids to the back of the head in a pinwheel style and then pop your wig cap on, adjusting as necessary. You can then put your wig on and style it as you wish! It really is as simple as that and does being something extra to your look!

We hope you have fun and stay safe celebrating this month, be sure to tag us in your celebration selfies and don't forget that you can find all of the Bella&Bear tools used in this tutorial in our online store now. You can also score 15% off of our famous Kitten 15 piece brush set with code 'KITTEN15'.