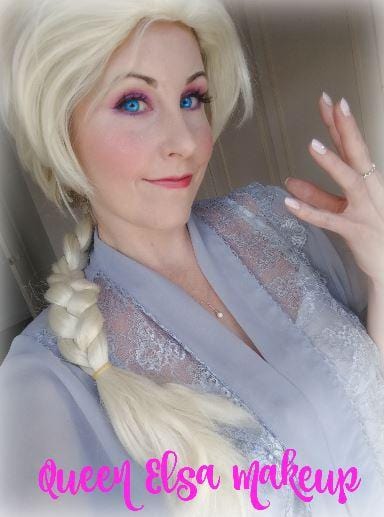
Queen Elsa Makeup Look
Share
To celebrate the release of Disney's Frozen 2 - and to tie in with this cold weather we've been having - we have decided to put together this Queen Elsa Makeup look! Perfect for chilly days Ice Skating, Christmas shopping - or for your festive parties!
We're going to start with our brows for this look. We begin by brushing through the hairs using our Bella&Bear Iberian Lynx brow brush spoolie. We want to make them quite long and angled.
We are then using the brush end to work some ABH Dipbrow pomade through the hairs to define that shape.
Now, taking our Bella&Bear Golden Cat concealer brush and some Essence Camouflage concealer, we are going to carve out the brows - outlining them with the product and pulling it outward to blend into our foundation later.
Lets start on the eyes now - they are going to be quite dramatic so we need to first go in with a primer to keep those shadows tightly in place and make them extra vibrant. We re using the Kryolan eye shadow primer and we work it onto the lid with our ring finger.
Now, using our Bella&Bear Jaguarundy brush we are going to start packing a matte purple shadow onto the lid - no further the the crease. We use the BH Cosmetics Take Me to Brazil palette here.
To follow, we are taking a purple shimmer shadow and we are going to press it onto the centre of the lid using our Bella&Bear Margay cat brush. We love the BH eyes on the 60s palette for this.
For that pop of pink we are going to use our Bella&Bear Bornean Bay Cat brush and we are going to work a matte bright pink shadow into the crease of the eye - blending it into that purple. The shadow we have used here is from the Revolution mermaids vs unicorns palette
Now, lets line and define! Taking our Bella&Bear Caracal angled liner and some Essence cushion liner, we draw in a long, thin wing along the upper lash line to gently define the shape. You don't want this to be too thick.
After using our Bella&Bear Eye&mighty curlers to add some lift and curl to the lashes, we add a coat of the Essence Princess lash mascara.
Then, we are going to add some falsies for all out princess eyes. We use our Bella&Bear angled tweezers to place some Ardell Demi Wispies falsies as close to the natural lash line as possible.
Lets begin on the skin. We are first working some Bodyshop Instablur primer over the face to make it poreless and flawless.
Next, we pick up our Bella&bear Lynx kabuki brush and we use it to apply our foundation. We are using a shade lighter than our own skintone to mimic Elsa's porcelain complexion. We work the TooFaced Born This Way foundation over the face and down the neck, and on the lips, too.
Lets conceal now to disguise any problem areas. We use the Urban Decay Naked Skin concealer with our Bella&Bear Ocelot concealer brush and we blend it over dark circles and blemishes.
Although we'd like a dewy skin, we still must set the concealer to prevent it from creasing and sliding. We are going in with our Bella&Bear Leopard face brush and some Essence All about matte powder and we press it on top of our concealer.
Lets spritz some setting spray over the face now to lock that base in place.
Now, using our Bella&Bear Marbled cat brush we are working some of that same purple shadow along the lower lashline
For that rosy, winter glow lets pick up some dusty pink blush on our Bella&Bear Bobcat brush now. We use the ' ' blush and we apply it directly to the apple of the cheeks with a swirling motion to keep the pigment even.
Now lets create those lips. Starting with the Essence Honey Berry Lip pencil, we 'draw in' the lips. We draw around the bottom lip as usual, but we slightly under-draw the top lip for that dainty Elsa smile.
Lets fill that in now. We are going for a deep pink lipstick - we've opted for the Max Factor colour elixir in Bewitching Coral - and we paint the lips with it using our Bella&Bear Rusty Spotted Cat lip brush.
As a final touch we are going to add some sparkle to the skin. We use some iridescent white glitter and we delicately dust it onto the high points of the cheeks and the temples, using our Bella&Bear Margay cat brush.
You may want to add some blue contact lenses here too!
Of course we need that signature ice white braid, so now we are brushing though our natural hair using our Bella&Bear Brush on You detangler, and we are then creating a tight braid on each side of the head.
Pin those braids to the back of the head as flat as possible and then pull on a netted wig cap - this will keep all those little fly-aways in place and will give your wig a good grip so it doesn't slide off!
Now you can pull on your Elsa wig, adjusting until comfortable!
You're ready to Journey into the unknown! We hope you enjoyed this look - be sure to check back to our blog tomorrow for our next installment of Blogmas 2019!


