Cream Contour 101
Share
Contour products have come a long way since the technique first became a hit. We've gotten our hands on specific contour palettes, sticks, brushes, sponges and more. So, we felt that it was time for us to do an updated version of our 2015 contour guide for you guys to try out - this new guide will give for a natural, yet structured face with a simple to follow technique!
For this guide we are using cream contour products as they give the most natural finish and are ultra buildable and blendable, depending on just how defined you want your face to be.

To start we prepped the face with a primer to create a barrier between our makeup and our skin. We used the Gerard Cosmetics BB+ Illumination creme and we buffed it over the face with our fingertips.
As we are using cream products to contour it is not strictly necessary for us to apply a foundation first, but you can if you wish to - particularly if you are using powder based contour products.
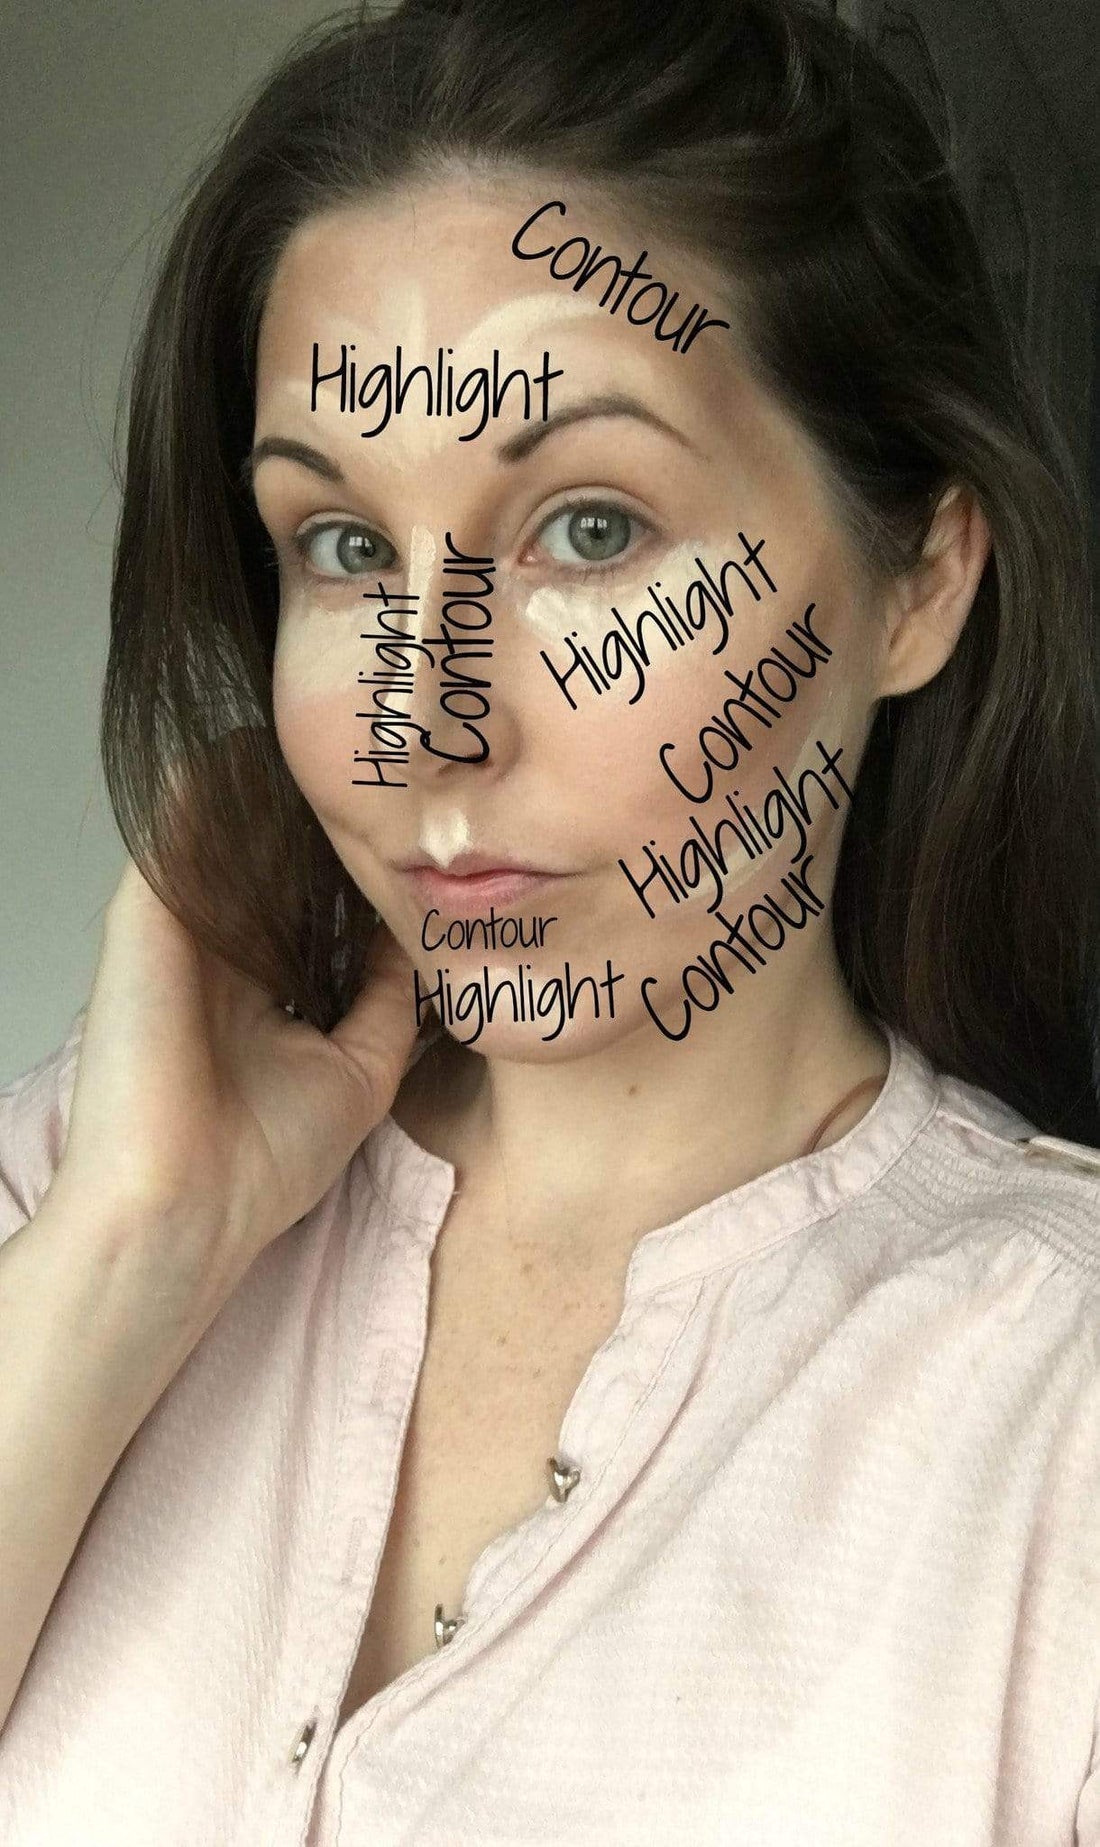
We are going to 'map' the face with our cream contour products now, starting with the dark contour colour and our Bella&Bear Ocelot Large Concealer Brush. We have used the City Colours Contour Palette but cream foundations also work well. Taking the brush we are working the contour cream into the hollows of the cheeks, around the temples and hairline, down the sides of the nose, around the jawline and under the bottom lip. You will look a little stripey but this is no problem as we will be blending later on.
Next, we are going to add some cream highlight to the face, applying it with our Bella&Bear Rusty Spotted Cat small Concealer Brush. We are placing this under the cheeks, under the eyes, down the centre of the nose, in a fan shape on the forehead and on the cupids bow.
The aim here is add more shadows and highlights were they would usually hit the face to further accentuate the face's natural structure and shape.

You can see our face map guide here gives a clear breakdown of where to apply each of your products.

Now, we want to work the lines you've created together, so that they give a seamless, flawless look to the skin. Taking our new Bella&Bear Jaguar Angled Kabuki we are blending the colours together using circular motions. Keep going until everything is blended and as defined as you'd like it to be.
To keep our masterpiece in place we are going to take a translucent powder and our Bella&Bear Leopard Face Brush and lightly dust over the face to set the makeup. We love the ELF Studio HD Powder.
 You can now go on to apply the remainder of your makeup look- making sure to apply a little highlight to make the face less matte and 'flat'.
We hope you enjoyed our updated contour guide and we would love to see your recreations so don't forget to tag us! You can find all of the Bella&Bear tools used in this guide - and all of our other pieces - in our online store right now! Happy shopping!
